|
Pfalz E.I
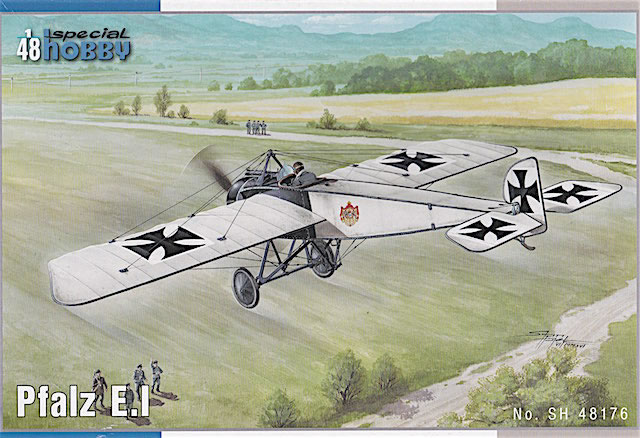
Special Hobby, 1/48 scale
S
u m m a r y |
| Description and Catalogue Number: |
Special Hobby Kit No. SH 48176 - Pfalz E.I |
| Scale: |
1/48 |
| Contents and Media: |
Approx. 68 tan plastic parts; sheet of clear acetate for windscreens; fret of photo-etched brass parts; one sheet of vinyl pre-cut canopy masks with full placement instructions; two decal sheets with markings for three aircraft; 10 page instruction booklet with full colour assembly and painting guidepart; one colour and one nickel-plated photo-etched fret; markings for three aircraft |
| Price: |
€ 24.90 plus shipping available online from the Special Hobby website
£19.99 EU Price (£16.66 Export Price) plus shipping available online from Hannants |
| Review Type: |
FirstLook |
| Advantages: |
A welcome re-release; accurate mouldings; high levels of detail |
| Disadvantages: |
Some fettling required to achieve a good fit in some areas. |
| Conclusion: |
Special Hobby’s 1/48 Pfalz E.I is a welcome reissue of Gavia’s 2006 original. This was a good kit when first released, and it remains so today. It won’t be a quick build, however; the combination of some tricky fit and complex rigging and decals make this a project to be savored at leisure. The result, however, will be an accurate, well-detailed model of a little known but attractive early World War I aircraft. |
Reviewed by Brad Fallen

Airfix's 1/48 scale Spitfire Mk. Vb will be available online from Squadron.com
The Pfalz E.I didn’t make a big contribution to German aviation in World War I. A licence-built copy of the pre-war French Morane-Saulnier Type H, the E.I was an obsolescent design of which less than 100 examples were built. It was nonetheless a stepping-stone in the development of Germany’s aviation industry, and helped to pave the way for later, more successful Pfalz machines such as the D.III/IIIa and D.XII.
For an aircraft built in such small numbers, the Pfalz E.I has been reasonably well represented in model form. There have been two 1/48 scale kits, both limited run and long out of production. The first was in resin from niche French manufacturer JMTG, which appears to date from the early-mid 2000s. The only review of this release I could find said it went together well for a kit of its type, and it certainly built into a good looking model.
The second kit was Gavia’s 2006 injection-moulded example. This also received generally positive reviews – see here and here – and it also built well. The kit was praised for the accuracy and finesse of its mouldings, but criticised for fit in some areas, particularly the cockpit assembly.
Like the JMTG kit, Gavia’s E.1 has been long unavailable outside swap meets and internet auction sites. Now, however, Special Hobby has reissued it in almost identical format to the original 2006 release.
One thing that has changed with the new edition is the box art, which features a Pfalz factory aircraft adorned with the Bavarian coat of arms (marking option A) flying low across an airfield before a group of observers. Lifting the lid reveals the following contents.
Two sprues of olive brown plastic parts
The E.1’s small size and comparative simple design is confirmed by the low parts count – less than 70 by my reckoning. These are moulded in brown plastic used by Eduard until several years ago – and given that Gavia was an Eduard brand, I suppose it’s possible the sprues in this latest boxing could date back to the original release. It may also be a complete coincidence!
One sprue contains all of the main airframe components, while the other holds smaller parts such as propellers and the cockpit and undercarriage components. Both are cleanly moulded with reasonable detail and very little flash. The lack of locating pins for the fuselage, and minimal attachment points for the comparatively heavy wings, will need to be taken into account during construction. While using a structural rigging material, such as fishing line, will improve the strength of the wing joins, I’d strongly recommend also using brass rods to enhance their attachment.
There are a couple of points worth noting about the fuselage and wing mouldings. These are covered in more detail in the linked reviews above, but it’s worth knowing that the at-first-glance heavy handed ‘rib tapes’ on the wings are in fact accurate representations of wooden battens that were attached over the ribs. Less correct are similar details on the fuselage, which didn’t feature raised battens; however, these will be easy to tone down with some sandpaper.
Several build reviews point out that while the well-moulded Oberursal engine lends itself to the addition of details such as rocker arms and pushrods, if you’re not careful these will interfere with the engine’s fit into the cowling. This is another nicely shaped part, complete with the Pfalz logo moulded delicately on to the front.
Another area of reportedly tricky fit – as mentioned earlier – is the cockpit assembly. This is very well detailed, but needs careful fettling to avoid fouling alignment of the fuselage halves. Patience will also be essential for the construction of the undercarriage and fuselage decking assemblies, which require carefully bringing together numerous small plastic and photo-etched parts.
Photo etched fret
Speaking of which, the photo-etched fret contains a mix of larger parts, such as the seat harnesses and machine gun cooling barrel, and a number of very small parts many of which are intended as rigging attachment points.
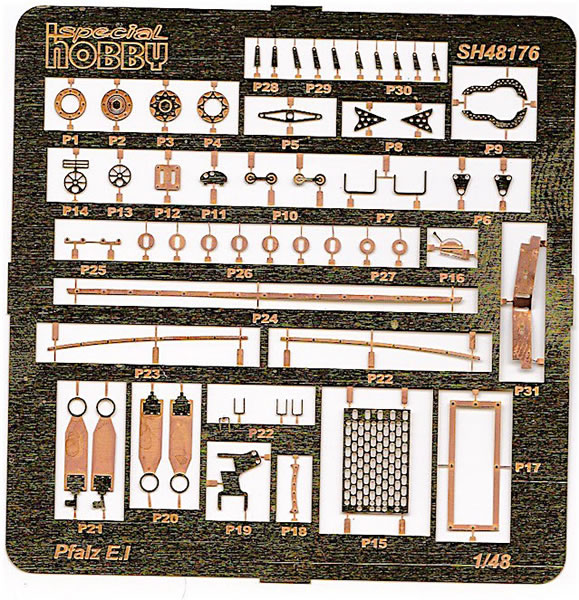
Getting all of these attached in the right places – and keeping them attached – will again require patience.
Small clear acetate sheet
Two copies of the E.I’s rudimentary windshield are supplied on a small sheet of clear acetate. I’m glad a spare is provided, as the windshield will require careful trimming to remove from the sheet, and even steadier hands to attach its tiny photo-etched stiffener and then glue the assembly to the cockpit coaming.
Assembly, rigging and marking guide
The 12-page instruction booklet is typical of current Special Hobby releases – comprehensive and clearly illustrated with full-colour drawings and paint colours called out in Gunze numbers. The only downside is that the booklet’s A5 size means the illustrations are small and closer together than is really ideal; this means you’ll need to study them closely before starting to glue things together.
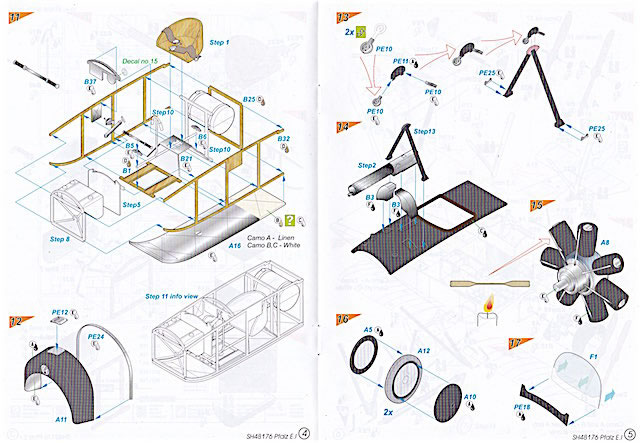
The E.I’s wing-warping controls were operated by a complex system of rigging wires, which the instructions clearly illustrate through a series of detailed drawings. The rigging will still require patience and precision to complete, but will add enormously to the look of the finished model.
Full colour, four view drawings are used to illustrate the marking options (see below), and leave no doubt about the correct paint colours and decal placement locations. The instructions point out – and contemporary photos confirm – that oil sprayed from the E.I’s rotary engine caused considerable staining on nearby fabric surfaces.
Markings
Special Hobby provides markings for three E.Is, all of them plainly finished in either unbleached (option A) or bleached (options B and C) linen with black cowling, undercarriage and forward fuselage.
All of the wing battens, and wing, fuselage and tail edges, were finished in a thin black trim. This trim adds considerably to the E.I’s charm – making it much more interesting in appearance than, for example, the Fokker Eindecker that carried no such markings – but it is also tricky to replicate. Convincingly painting the trim would likely be beyond the ability of many modellers (myself included), so Gavia and now Special Hobby have used decals to solve the problem.
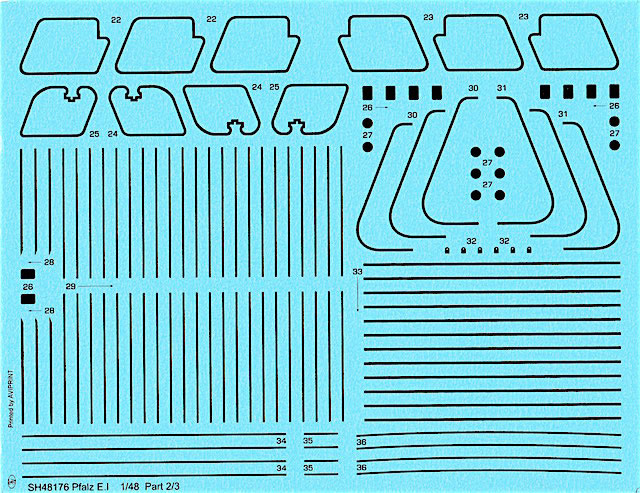
The black trim decals are approx. 1-2 mm wide, with roughly the same amount of clear carrier film on either side. The exception here is the curved lines for the wingtips, which have considerably more carrier film (presumably to help with stability during application). Trial and error, and taking things slowly, will be the order of the day here – fortunately Special Hobby supplies a number of spare decals in case anything goes wrong….
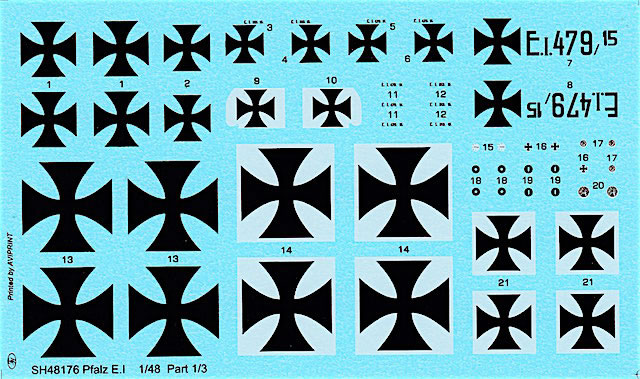
The second, mid-sized decal sheet contains the iron cross identification markings that were applied to the wings, rudder and – charmingly – upper and lower horizontal stabiliser surfaces. There are also production codes for option C (the only marking choice that carried them), along with a number of smaller airframe and instrument decals.
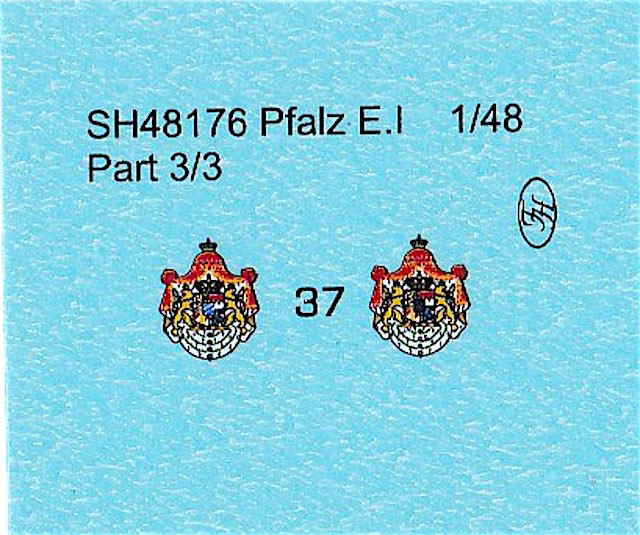
The final, very small sheet contains two Bavarian coat of arms decals for the fuselage sides of marking option A.
The decals are by Aviprint and look to be well produced, with crisp borders and good colour density.
Special Hobby’s 1/48 Pfalz E.I is a welcome reissue of Gavia’s 2006 original. This was a good kit when first released, and it remains so today.
Don’t approach it as a quick build, however; the combination of tricky fit and complex rigging and decals make this a project to be enjoyed at leisure and with patience. The result, however, will be an accurate, well-detailed model of a little known but attractive early World War I machine.
Thanks to MPM/Special Hobby for this review sample
Text and Images Copyright © 2017 by Brad Fallen
Page Created 9 February, 2017
Last updated
9 February, 2017
Back to HyperScale Main Page |
