Tamiya's 1/48 scale
Fieseler Fi 156 Storch
by Brian Bourdon
|

|
Fieseler Fi 156 Storch |

This is Tamiya’s 1/48 scale Fieseler Fi 156 Storch as it would have appeared in North Africa circa 1942.

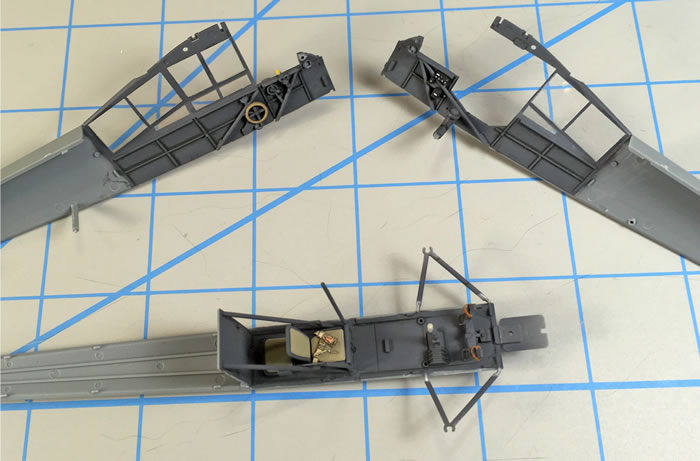
Work begins with the cockpit. The tubular structure is well represented and once all the bits are installed, it’s time to think about painting the interior. While I don’t think it is necessary to mask the windows from the inside, I did so just the same with masking tape. I airbrushed my own version of RLM 66 instead of the suggested RLM 02.
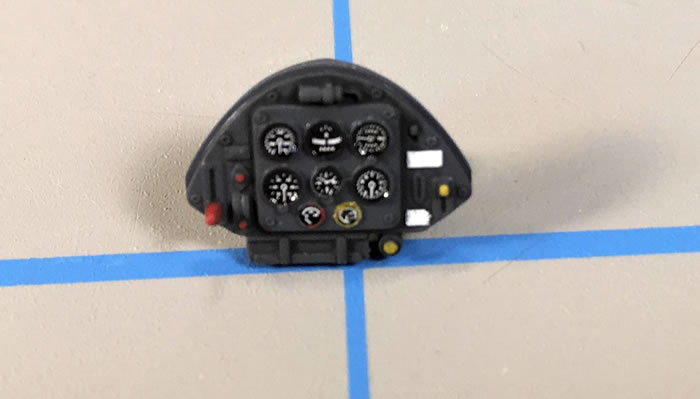
At that stage of the war, I suspect the use of either was possible. Had I opted for the lighter color, I would have certainly swapped the late styled rudder pedals for the earlier ones which are included as options, by the way.
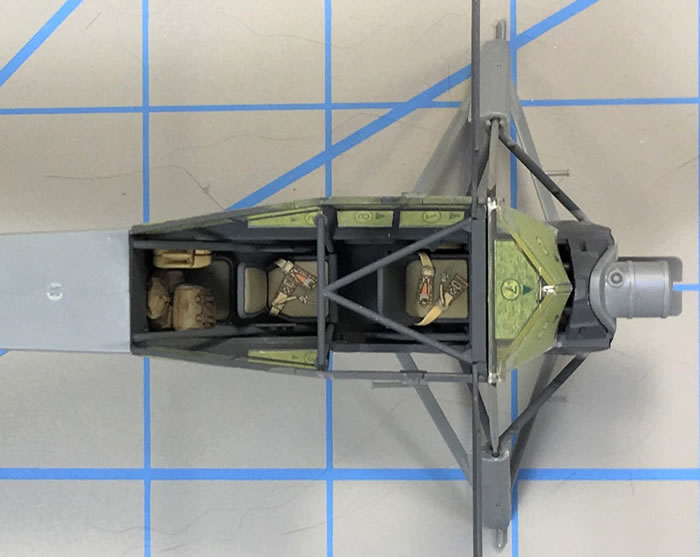
I loaded some luggage onto the rearmost seat because I never met a bush pilot who didn’t toss a few personal effects in an empty nook somewhere or other and I assumed that a Storch pilot would be of like mind. Also, the clutter hides the fact that I omitted the harness there.
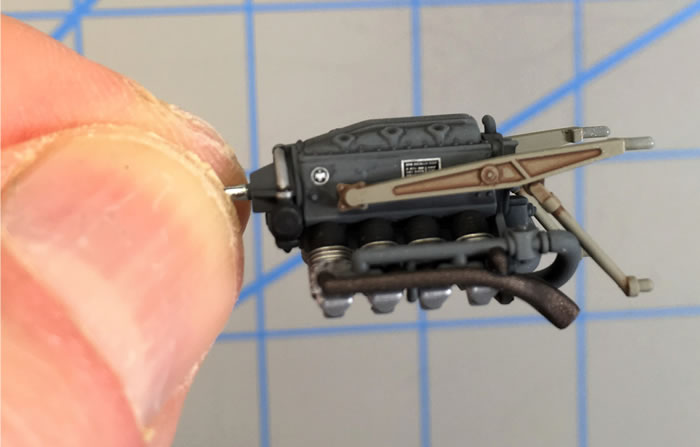
The tiny Argus A-10 power plant is a jewel in itself. Too bad little of it is seen with the cowl glued in place. I took a photo for posterity.
The somewhat spindly landing struts are very well rendered and were installed with only a few minor adjustments. I reinforced the join where wire meets plastic with a bit of super glue. It is important to get the alignment just right at this point as it directly impacts how the wind will sit, level or not.
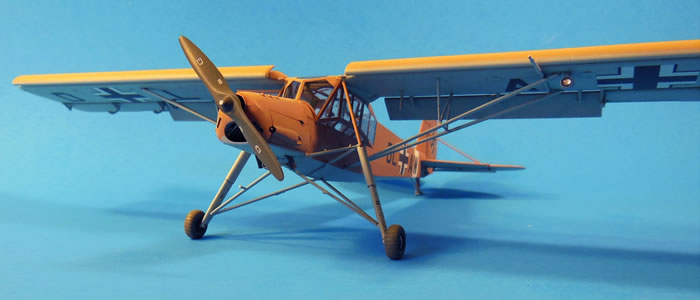
A word on fit overall. Surprisingly, there were some issues, notably with the tail planes and cowl. In these areas, a little careful work with a file and some filler was required. Having said that, considering that the Storch is a flying mess of flaps, slats, struts and foot holds, assembly was straightforward with no undue drama.
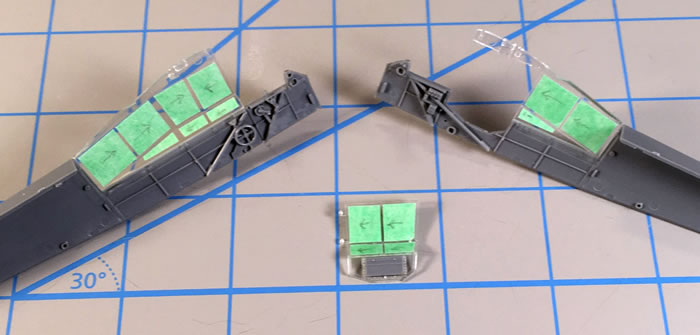
I am not a big fan of pre-printed masks. Generally, I’ll give one or two a try before tossing the lot into my ‘decals file’ where there is an excellent chance they will never again see the light of day. I find that frosted tape works best in most situations. However, I will admit that these particular masks worked relatively well and I certainly grew to appreciate them all the more once I started to mask the upper glazing with all of those wonderful compound curves. Plus one for Tamiya. Huzzah!
The Storch was finished with Aeromaster RLM 78/79. The metal areas on the upper wings were faded slightly and the national insignia were ‘dulled’ a bit with a gentle overspray of super thinned RLM79.
All in all, a fun build.
Model and Text Copyright ©
2021 by Brian Bourdon
Page Created 3 September, 2021
Last Updated
3 September, 2021
Back to
HyperScale Main Page

|
 Home
| What's New |
Features |
Gallery |
Reviews |
Reference |
Forum |
Search
Home
| What's New |
Features |
Gallery |
Reviews |
Reference |
Forum |
Search