Hasegawa's 1/35 scale
Galleon Tank from “Crusher Joe”
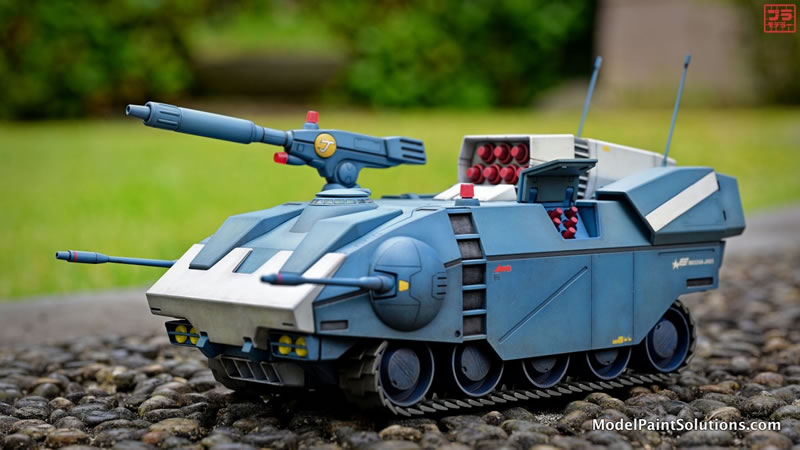
by Ken Szeto

Summary
Article Type: Build
Description: Hasegawa 1/35 Galleon Tank from “Crusher Joe” by Ken Szeto
Kit #:
64795
Scale:
1/35
Model, text, and photography by Ken Szeto
Background
The Galleon Tank is a ground assault vehicle from the 1983 anime, Crusher Joe. The story follows the adventures of a team of misfit anti-heroes led by Joe, along with Alfin, Talos, and Ricky.
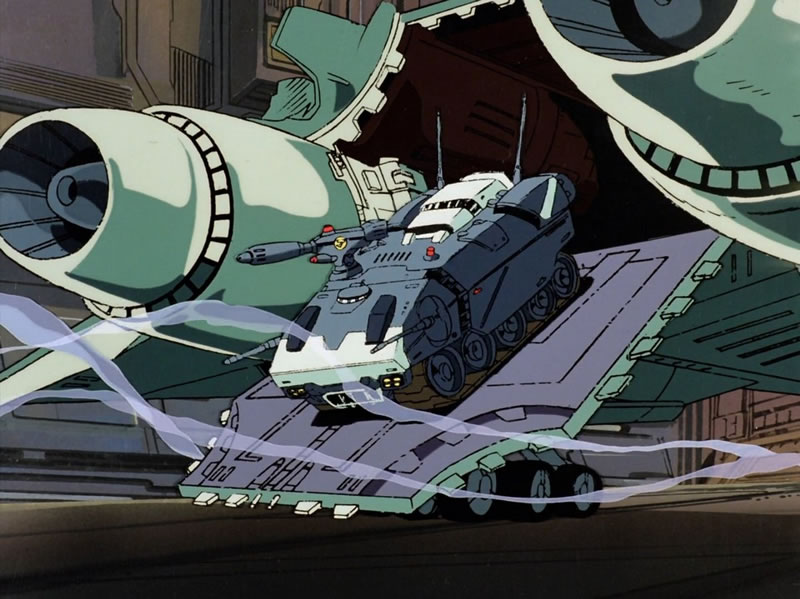
The term "Crusher" comes from the Crusher Counsel during the early days of space exploration, where rugged individuals took on assignments ranging from destroying asteroids and defining space lanes to transportation and terraforming. The anime's mechanical designs were the work of legendary designer Kawamori Seiji, known for his famous work on the Valkyrie from SDF Macross (or Robotech in North America).
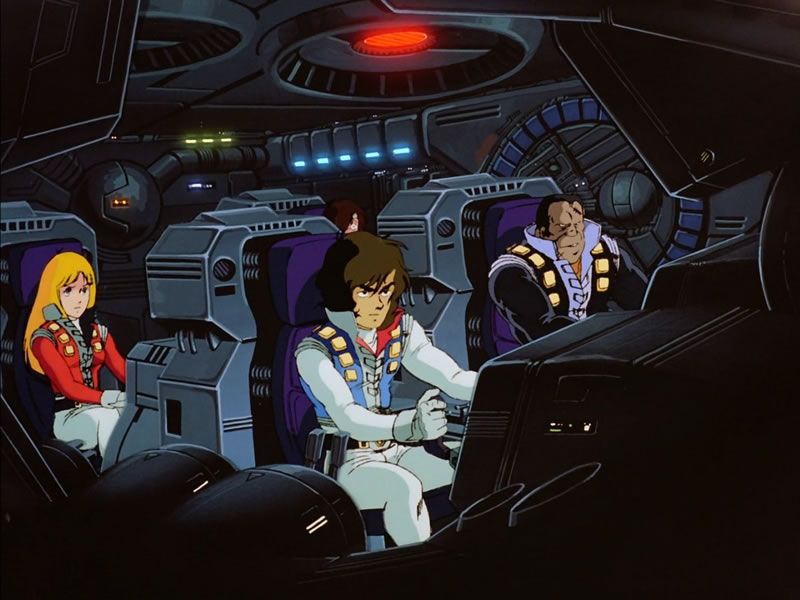
Kawamori often drew inspiration from real-life vehicles, giving them a futuristic sci-fi treatment. The Galleon Tank was likely inspired by the M113 APV. In the anime, the Galleon Tank wasn't prominently featured; instead, the spaceship Minerva and fighter jets Fighter 1 and Fighter 2 were more popular. On a side note, I have a video on Fighter 1 with LED lighting on YouTube.
URL to Fighter 1 video: https://youtu.be/mnYP77iQtJA?si=PDdOUwOC0n9Jk5H2
In recent years, Hasegawa has been adding sci-fi/anime models to their product portfolio. Unlike Bandai, which focuses on articulating robots, Hasegawa excels in creating static models with fine details. The Galleon Tank doesn't have many fancy sci-fi panel lines; instead, it features a highly detailed cockpit with pilots. Additionally, the model includes articulated guns, rocket pods, and covers. The caterpillar tracks are a single molded piece, making assembly less tedious for those new to tank/armor kits, like myself.
Lighting the Model and Cockpit Modifications:
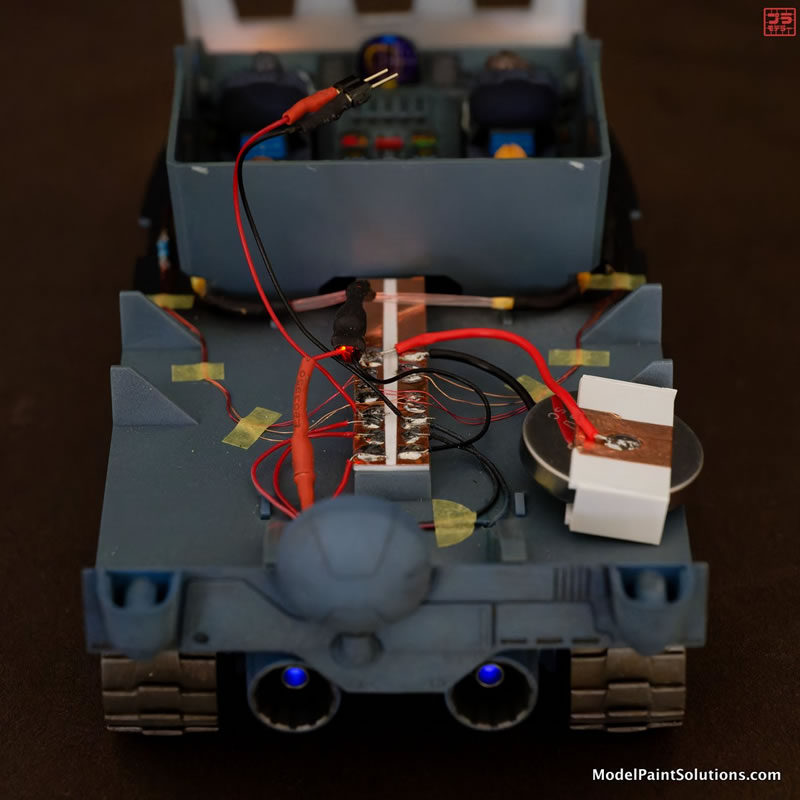
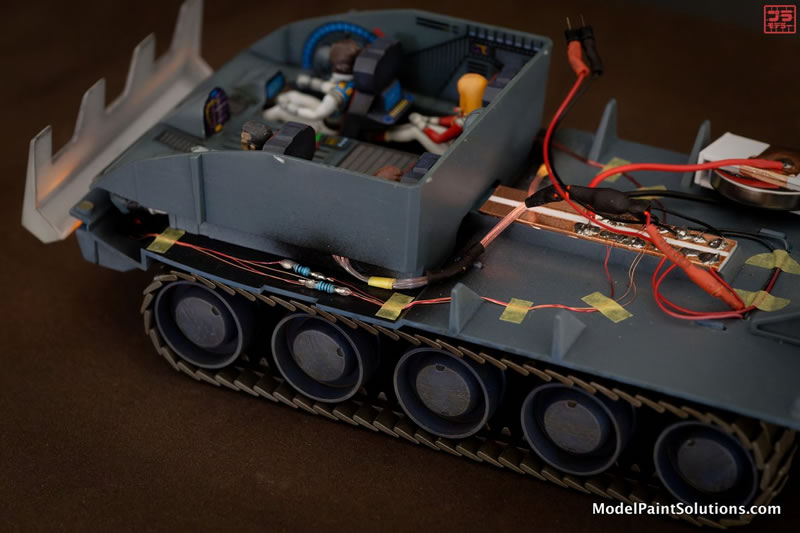
This model kit can be built as is, but upon studying the parts and instructions, I noticed ample room to add LED lighting. It would have been a shame not to give it a try, so I added holes for LEDs in the two engine exhausts, headlights, some instrument lights in the cockpit, and the beacons on top of the tank and the cannon.
For the headlights, I drilled holes in the pieces that hold the clear parts and the grille together, as well as the tank's bottom piece, for SMD LEDs. I chose yellow LEDs since the painting guide suggests using clear yellow on the headlights. The wires are fed through and held down using masking tape.
For the engines, I drilled a hole in each exhaust and glued a 3mm blue LED to each unit. The wires are hidden under the assembly, requiring no additional work. In the cockpit, I used eight strands of 0.25mm fiber optics with a 3mm orange LED to light up the small rounded sensor lights instead of using the supplied waterslide decals.
For the beacons on the cannon and the tank, I used 1mm side-leaking fiber optics with a 3mm red LED with a breathing effect from Evan Designs. The breathing effect and side-leaking fiber optics provided an excellent effect that I might use in future builds.
To connect all the LEDs, I used copper tape and a 1mm styrene sheet to create bus bars, soldering all the LEDs inside the tank. I also made a custom battery holder for a button battery. I didn't add an on/off switch since I modified the tank body and bottom plate with sheet metal and magnets, making the tank body fully removable.
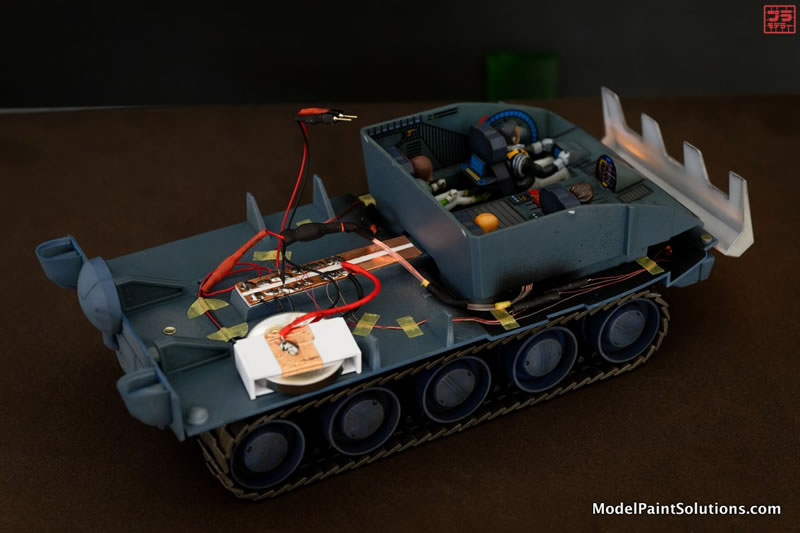
For the instrument panels, Hasegawa didn't mold many details for buttons and sensors, relying on waterslide decals instead. While the decals looked nice, they weren't enough for experienced modelers. So, I used FreeCAD and TinkerCAD to create small brackets and buttons to add to the cockpit, using the decals as a guide. Although not perfect, I liked how the custom 3D parts enhanced the cockpit.
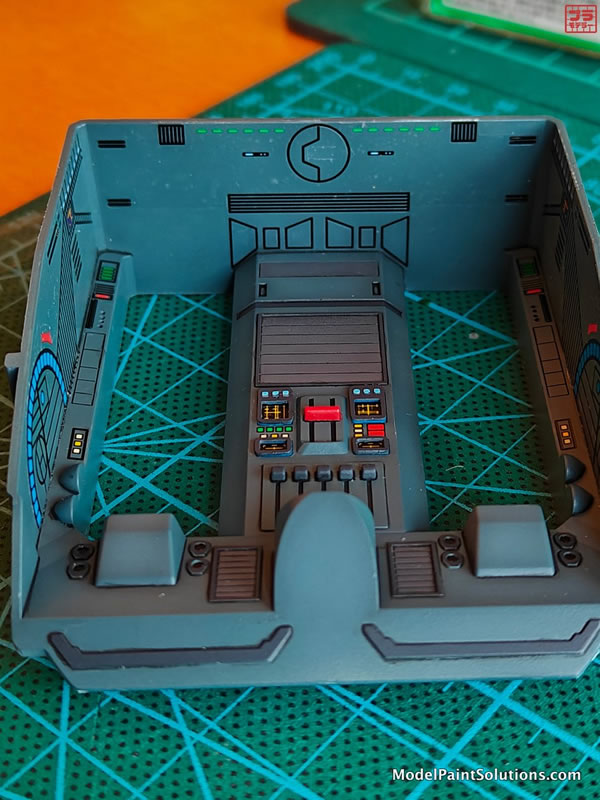
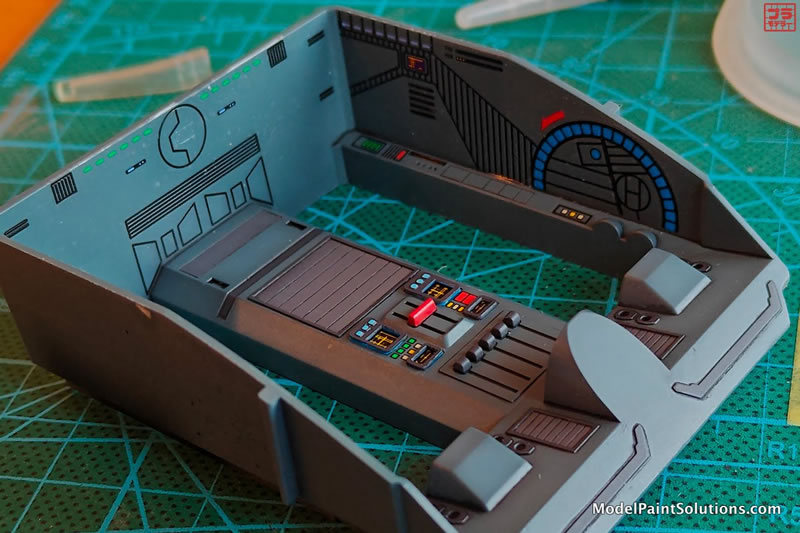
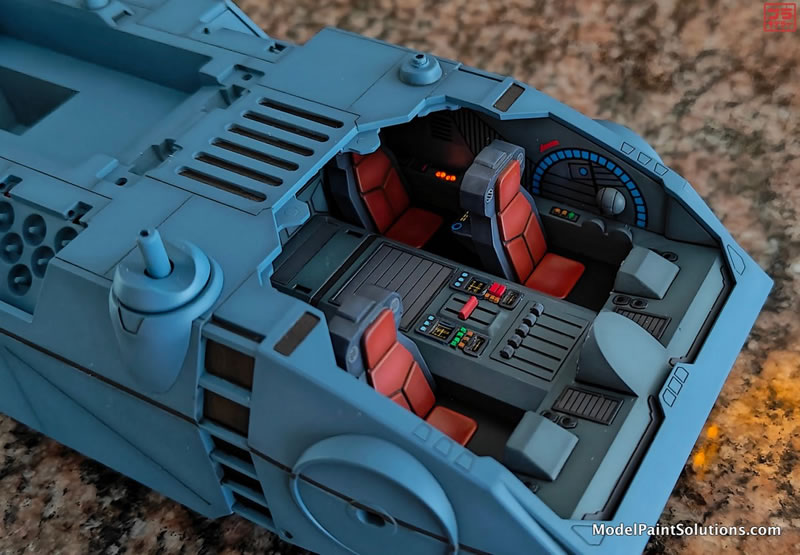
If I could redo it, I would improve the side panels for a more embossed look.
Painting, Shading and Weathering |
I started this model by painting the figures first. Knowing myself, if I began with the tank, I might not have painted the figures afterward. The figures were fun to paint; I started with the primary colors, then applied a brown wash on the faces and a grey wash on the uniforms. The eyes are decals from Archer, who are sadly no longer in business. Note: I shaded Alfin's hair (the blonde figure) with clear orange to give it a more anime look.
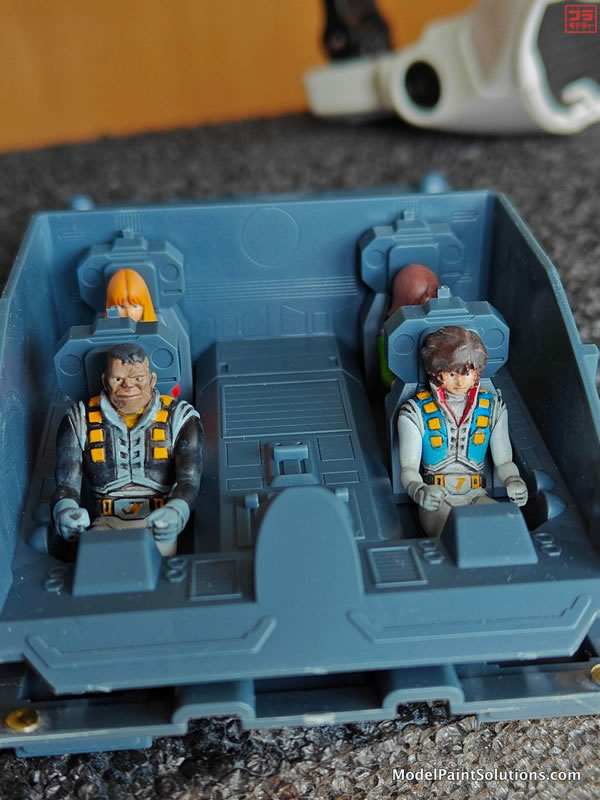
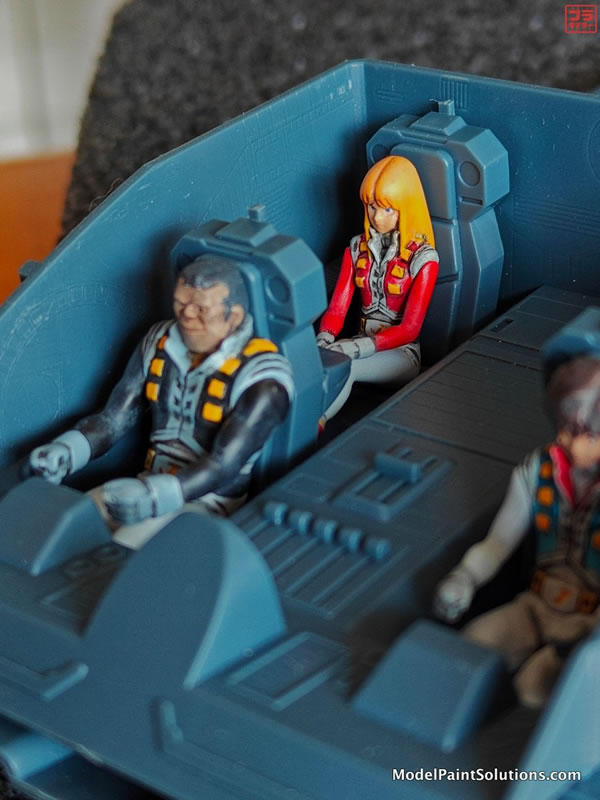
For the tank, I airbrushed the colors from the manual. After applying the main colors, I airbrushed Mr. Color's Clear Black on the panel lines for post-shading. For highlighting, I discovered Gaia Note's "Clear White" a few years ago. The shop didn't know its purpose, but I theorized it was for highlighting or creating light shades on a model without mixing a lighter shade of the main color. My theory was correct, but one must be careful with clear white. Applying too much can add a blue tint to the base color, so it's best to apply it from the center of a panel and work outward.
For weathering, I used Tamiya panel line color to fill the panel lines. I dry-brushed and washed the model with black, grey, and burnt umber oil paint to create dirt streaks. Finally, I used thinned acrylic sandy brown (90:10) to blend everything together as well as using the mac valve on the airbrush to add splattering effect with the same sandy brown colour.
Thanks for reading along.
For more on this review visit ModelPaintSolutions.com
https://modelpaintsol.com/builds/hasegawa-galleon-tank-crusher-joe
Text and Images Copyright © 2024 by Ken Szeto
Page Created 2 August, 2024
Last updated
2 August, 2024
Back to HyperScale Main Page
Back to Reviews Page

|
Home
| What's New |
Features |
Gallery |
Reviews |
Reference |
Forum |
Search