Academy 1/72 scale
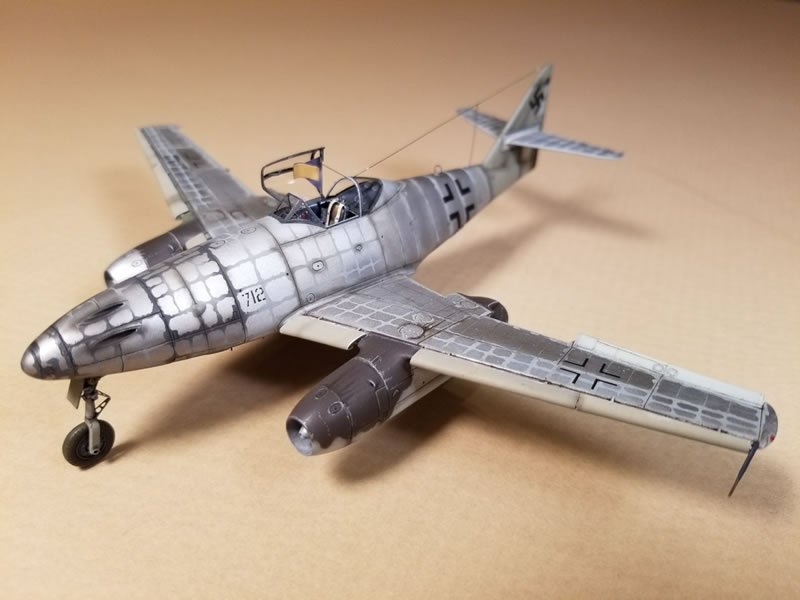
Natural Metal Me 262 A-1a
by Steven Hustad

Description:
Natural Metal Me 262 A-1a by Steven Hustad
Scale:
1/72
Kit:
#12410
Review Type:
Build
Introduction
I’ve always been fascinated by those late war Me 262’s that were manufactured under the worst of circumstances – in hollowed out caves, at ‘open-air’ forest factories, or just in bombed out regular factories without roofs that were somehow kept going. And, when we get into very late 1944 to 1945 production, we see a predominance of these aircraft leaving those ad hoc factories in natural metal and national insignia, but with no camouflage paint applied.
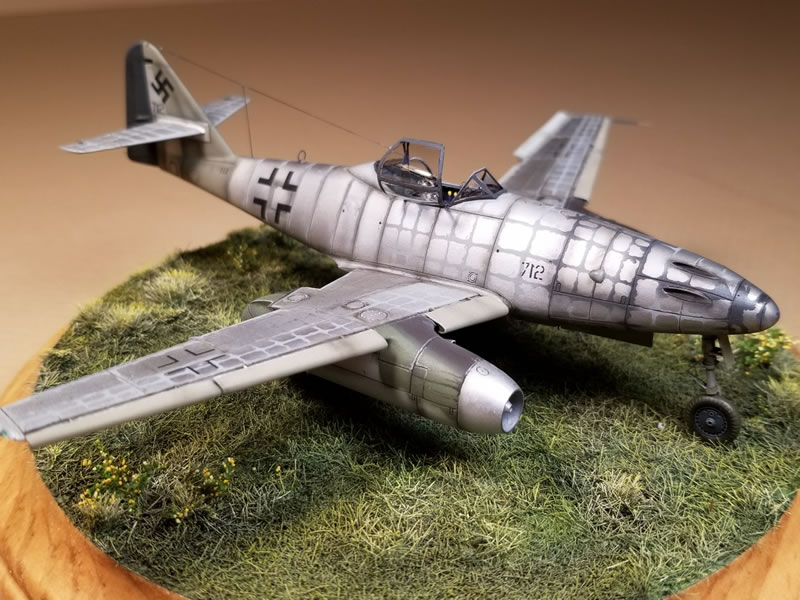
Another anomaly is that the putty used to fill the rivet lines to give a smoother finish, and thus result in a faster aircraft was also a noticeable feature – especially among jet propelled types. For a long time that putty was thought to be a sort of light ochre color. But in recent years as more and more color photographs appeared it was proven to be more of a medium bluish-gray tone. The application of this putty and the sanding down that followed was by no means regularly carried out! Numerous different patterns and applications show up in period photographs.
Background
I’ve always been fascinated by those late war Me 262’s that were manufactured under the worst of circumstances – in hollowed out caves, at ‘open-air’ forest factories, or just in bombed out regular factories without roofs that were somehow kept going. And, when we get into very late 1944 to 1945 production, we see a predominance of these aircraft leaving those ad hoc factories in natural metal and national insignia, but with no camouflage paint applied.
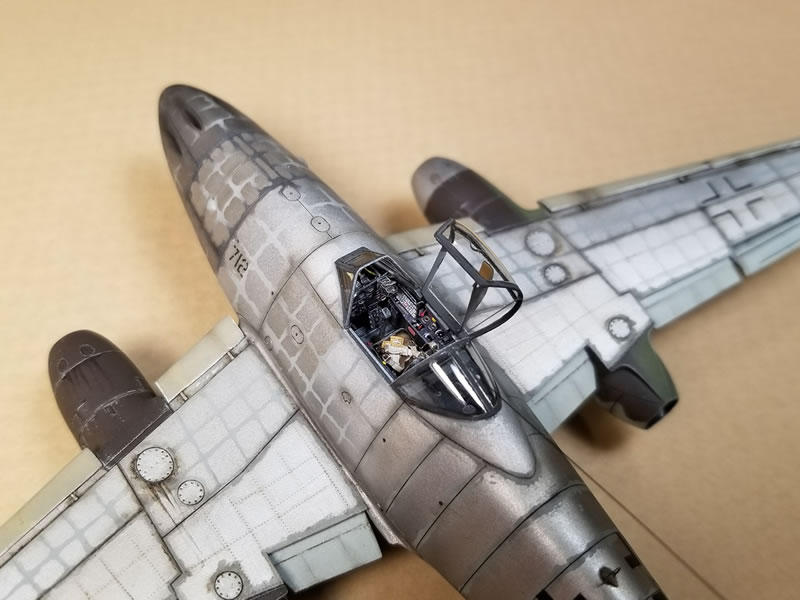
Another anomaly is that the putty used to fill the rivet lines to give a smoother finish, and thus result in a faster aircraft was also a noticeable feature – especially among jet propelled types. For a long time that putty was thought to be a sort of light ochre color. But in recent years as more and more color photographs appeared it was proven to be more of a medium bluish-gray tone. The application of this putty and the sanding down that followed was by no means regularly carried out! Numerous different patterns and applications show up in period photographs.
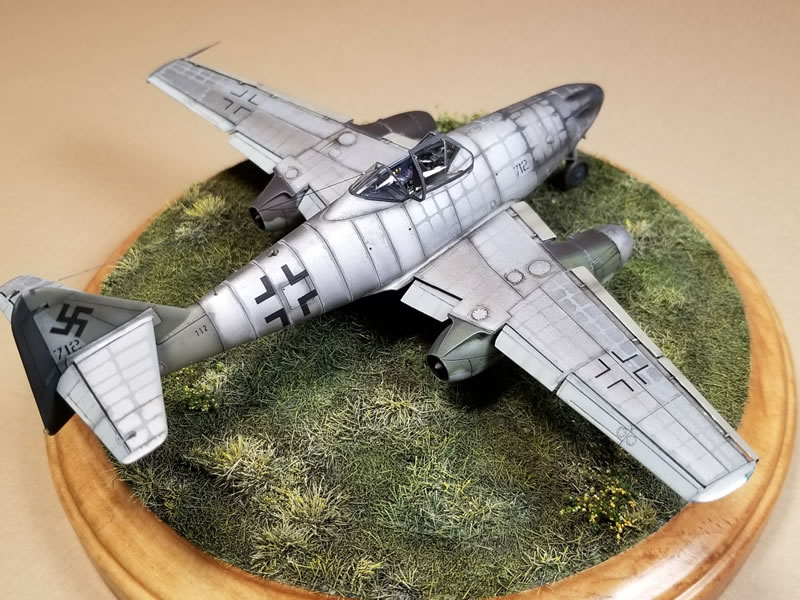
Another variable noticeable with these late manufactured aircraft was the variation in the finish of the ‘off site’ manufactured components. These kinds of things included the flaps, ailerons, rudders, elevators, wing slats, landing gear door covers, tail units, the whole gun nose assembly, etc. Some of these arrived at these “factories” from subcontracted ‘mom & pop’ German furniture makers, civilian building construction manufacturers and so on. Pretty much by this stage of the war all hands were needed to contribute, but especially to de-centralize aircraft construction to the extent possible so that the relentless allied bombings had a bit less of an impact on production. Metal components were often arriving in overall RLM 02 light gray/green finish. Wooden and fabric parts were often painted in RLM 76 light blue/gray paint. (Or vice versa!) The entire gun nose assembly appears to have been typically painted overall in the RLM 76 color – or a much lightened variation of it; that piece arriving after having already been test fired!
Sometimes, photos show regular aluminum airframe sections painted in RLM 02, or RLM 76 (vertical stabs and pieces of the rear fuselages often). This also results in an interesting look. All of these weird varying features make these late war natural metal Me 262s (or He 162s, Ar 234s, or Do 335s) that much more interesting! (Though my wife may disagree and find ‘other things’ more interesting as I’m frequently reminded…).
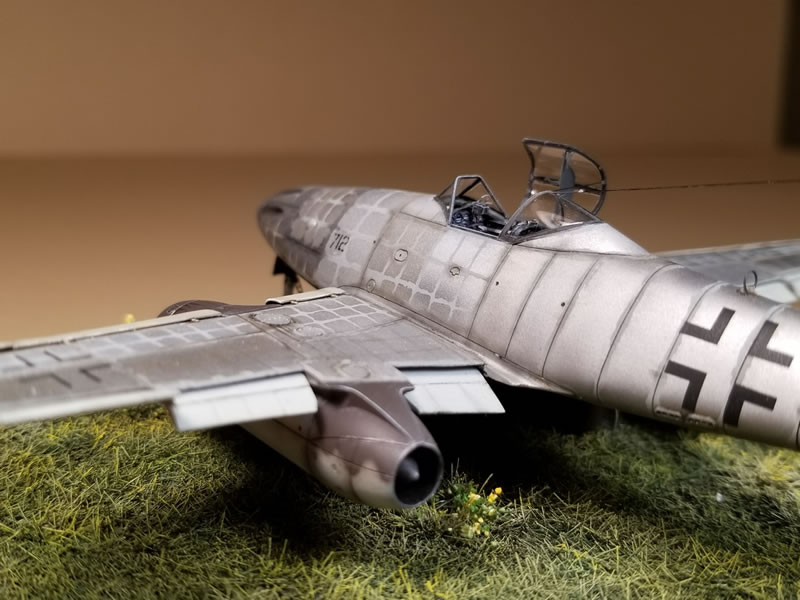
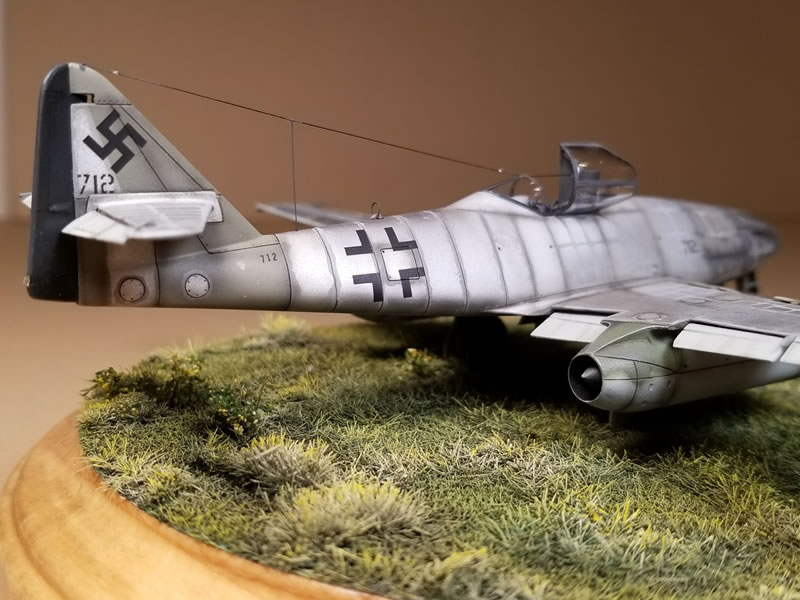
Probably the most famous and very well documented Me 262A in this scheme is Werk Nr.111711 captured and tested by the allies at the end of the war and flown at Wright Field in Ohio during the summer of 1945. It’s “sister” (Werk Nr.111712) was photographed somewhere out in a field near Innsbruck Austria at the end of the war. This aircraft was interestingly outfitted with camouflaged engines attached! Often, operational camouflaged Me 262s were fitted with natural metal replacement engines (as they didn’t last long), so ‘111712’ was indeed a VERY interesting bird! So of course that’s the one I decided to model. Both are believed to have come from the now well-known ‘Schwabisch-Hall’ final assembly plant.
Unfortunately, this is one build where I didn’t take any ‘in progress’ shots, so you’re stuck with only pics of the resulting model (sorry!). I only model in 1/72nd scale, and already had on hand Academy’s Me 262A (#12410) along with a slew of aftermarket sets for that kit that were also stuffed into the box. I think overall, the now ancient 1/72nd Hasegawa Me 262s remain those with the best overall outline and shape, but I already had the Academy kit that is otherwise pretty nice, so I soldiered on…
Academy’s Me 262 suffers from what (I think) are two semi-major flaws: 1) The nose is too ‘blunt’, and 2) the cockpit is too tiny. Some pretty aggressive sanding, reshaping & re-scribing took care of number 1 (mostly!), and Eduard’s nice fold up photo-etch cockpit (included in their PE set 73-302) took care of number 2.
Other improvements, materials, sets and methods used included the following:
-
A Loon Models resin seat (set No. LO72210) replaced the kit’s other seat options.
-
Czechmaster’s resin detail set No. 7153 was used for the primary wheel well and undercarriage detailing.
-
Kit ailerons, flaps, rudder, etc. were all cut away and replaced with those from Czechmaster’s resin detail set No. 7154 for replacing all of the flying control surfaces.
-
The molded in wing leading edge slats were all cut/ground away, substrates prepared with a sharp #11 X-Acto blade, sheet plastic & Apoxie Sculpt 2-part putty. The slats were replaced with scratch-built parts made in the ‘heat & smash’ technique using .20 Evergreen styrene card stock (plastic heated soft over a candle and then plunged down over a pre-prepared male mold held in a vise – ‘heat & smash’, see?).
-
The kit’s canopy was replaced with a vacform item from Rob-Taurus (No. 72046) that was cut into three parts so the canopy could be displayed open. (These are nice canopies and I wish Rob Taurus would also do some for Eduard’s very nice new 1/72nd ‘109s, as those clear parts are WAY too thick!).
-
The paints used were all enamels and are primarily the newer Humbrol RLM 02, RLM 81, RLM 82, and RLM 76 shades all lightened a bit and thinned using the new VMS brand enamel thinners. Though my recent experimentation shows that AK’s Xtreme Metal Thinner works really well with Humbrol enamels too
-
The natural metal areas were painted withAK’s Xtreme Metal paints in four separate shades. The areas to remain aluminum were then masked with a liquid latex masking compound and Tamiya XF-83 RAF Lt. Gray/Blue was airbrushed over that to represent the puttied riveted areas. This was followed by darker sprayed areas at and around the nose to better match known photographs.
I had a great time planning, building and painting this model at every step of the way and am happy with the way it turned out. But, we DO need a new Me 262 series in 1/72nd scale – are you listening Eduard?, or Arma, or ICM, or IBG?!?
Thanks for reading through my ramblings all the way to this point!
Steve Hustad
(aka “The Mad Norseman”).
Keep your airbrush wet!
—John
For more on this review visit ModelPaintSolutions.com.
https://modelpaintsol.com/builds/natural-metal-academy-me-262a
Text and images copyright ©2024 by John Miller/Model Paint Solutions.
Text and Images Copyright © 2024 by John Miller / Model Paint Solutions.
Page Created 5 July, 2024
Last updated
5 July, 2024
Back to HyperScale Main Page
Back to Reviews Page

|
Home
| What's New |
Features |
Gallery |
Reviews |
Reference |
Forum |
Search