Ship Masking Basics
Text & Pictures by Ron Smith


Over the past 30 years I have developed techniques that make painting ships easier. Some violate the conventional wisdom of “paint light colors first”, which sometimes makes masking a huge pain. In this article I’ll be addressing techniques for masking the boot topping, antifouling coating, and decks.
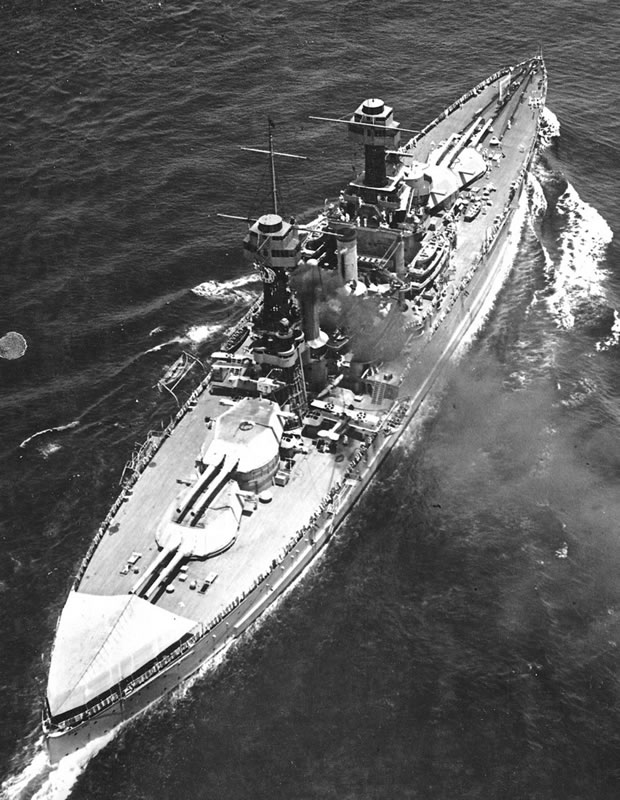
During WWII the USN had very specific painting instructions. The boot topping was black, the antifouling was either Norfolk No.65, Mare Island No.15 or Mare Island No.143; all were approximately the same shade of red. All horizontal and some sloping surfaces were painted 20B Deck Blue.
Masking the Boot Topping:
Starting with a primed hull, the boot topping is sprayed wider than it needs to be.
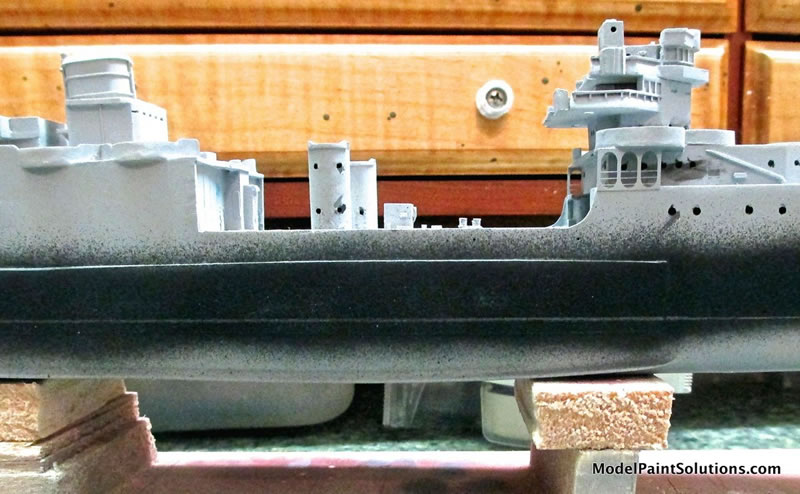
After the black is laid down, I have several methods to locate and mask the boot topping:
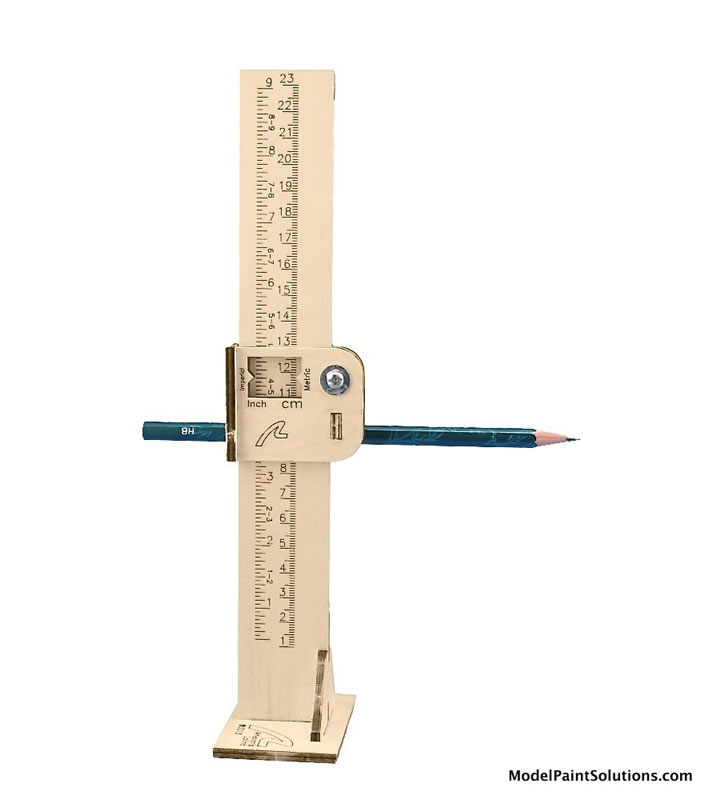
1) I place the hull on a level jig and using a Waterline Marking Tool (see photo), I strike a line that corresponds to the upper edge of the boot topping using a 6B or 7B pencil. I only use soft leads so they don’t scratch the paint.
Or
2) If I have a set of 1/350 plans, I measure from a few known points along the deck edge and put pencil tick marks at the top edge of the boot topping.
Or
3) When possible, I just “eyeball it” in relation to the external armor belt. Now, not all ships have an external belt but it’s quite obvious on those that do. For example, in the associated photo, a little of the boot topping can be seen just above the waterline. Above that, for most of the length of the ship, there is a bright line that is the result of light bouncing off the external armor belt.
The boot is masked with a single strip of appropriate width tape then the antifouling is sprayed on the bottom. Note that width of the boot topping varied by class of ship. It could be narrow or wide, straight or tapered. The larger the draft range, the wider the boot. You can find the design of the boot topping for the ship you’re painting in the kit instructions of course; assuming they’re accurate. You can also refer to the Booklet of General Plans (Outboard Profile) or find photos online.
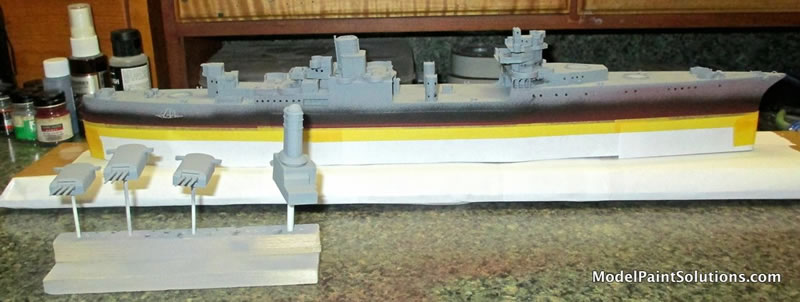
After the boot topping is masked appropriately, the bottom of the hull is sprayed antifouling red. After the red has cured, the hull is mounted on a permanent base, which is masked off with 20lb paper. A paper masking skirt is also taped onto the tape covering the boot topping.
At this point the model and all parts with horizontal or sloping surfaces are prepped and made ready for shooting with 20-B Deck Blue. Note: if I were doing a pre-war or post-war ship, it would be Deck Gray and whatever color I select for a bright wood deck.
Tricks for Masking the Deck:
For masking decks, my supplies include 1, 2, 3, 6, 10 and 18mm Tamiya tape or similar, a cutting mat, razor blades, surgical scissors, rulers (in decimal inches and millimeters), toothpick, tweezers, punches, and the DSPAIE Circle Cutter.
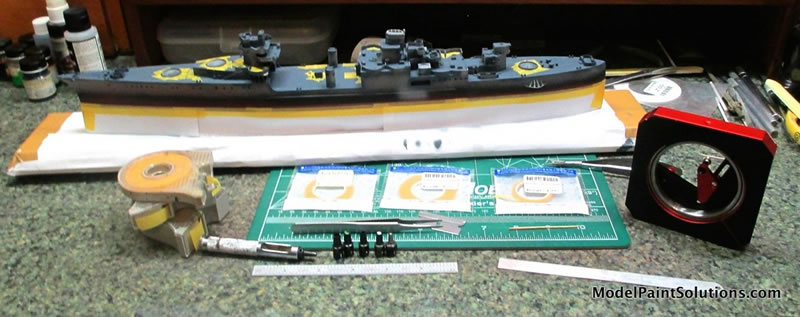
For tools I prefer a pair of Style-F, flat-tipped tweezers (professional not hobby store grade) and a toothpick with the end sanded square and flat for burnishing tape down.
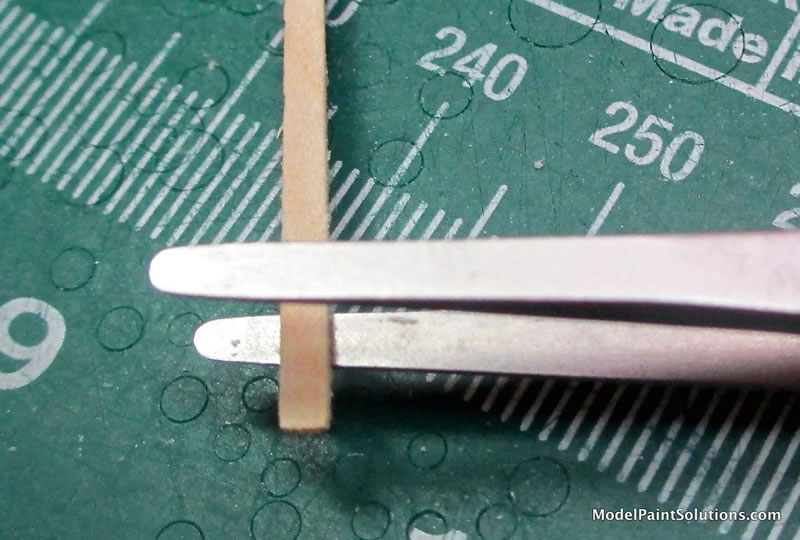
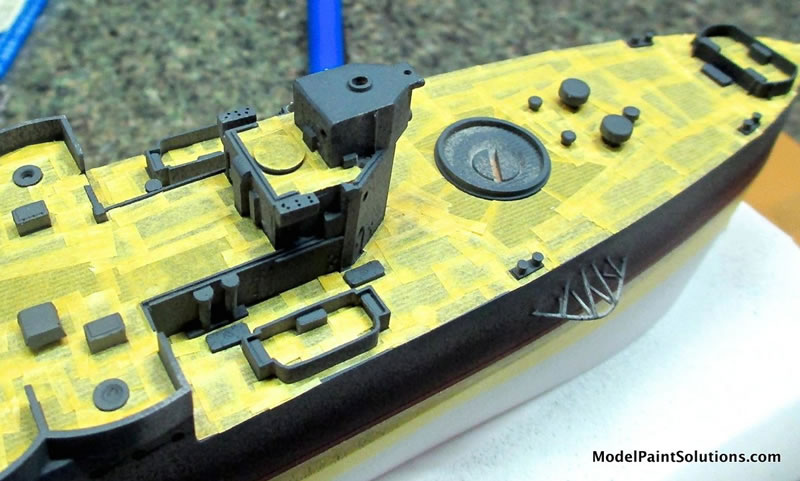
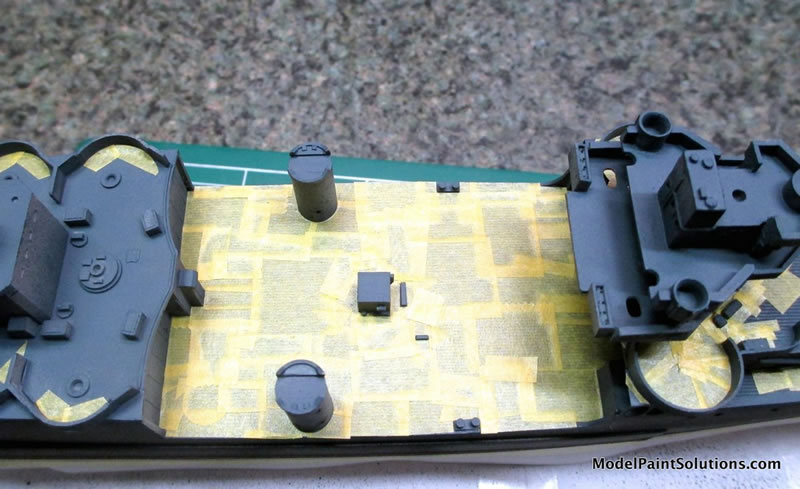
I start by cutting the larger circles from pieces of overlapped tape using the DSPAIE cutter. To do this, I lay the pieces of tape down in slightly overlapping sections. The overlap is approximately .030” to .060” wherever two pieces of tape meet. Extra bits of tape left from the circles are placed where appropriate. I carefully burnish the edges of the tape with the toothpick so as not to scratch the paint.
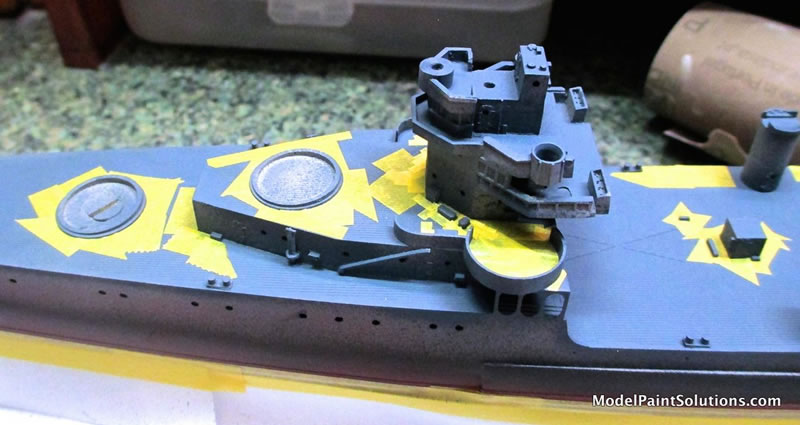
Once most of the large circles are masked, I pick an area and first outline the smaller fittings with 1-3mm tape then fill in with pieces of larger tape. Smaller circles are prepared using a punch. Again, you can't get them perfect size but using slightly overlapping pieces works just fine.
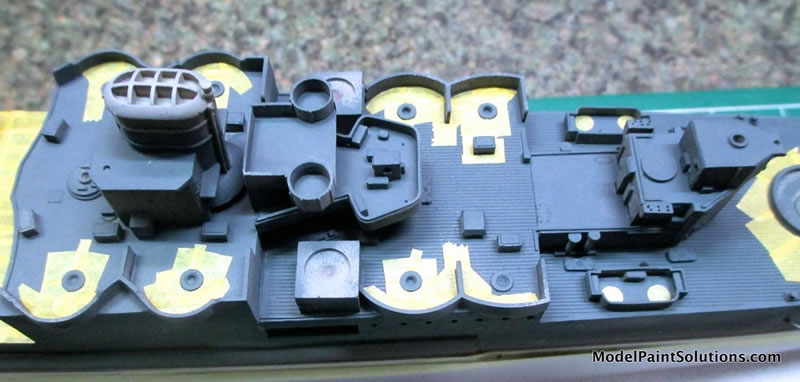
Note that every horizontal surface isn’t masked. Some areas are so small that it’s easier paint them later with a small trim brush. If you so choose, you can use a liquid masking compound just be sure it’s compatible with the paint you’re using.
Comments on Airbrushing Larger Ship Models:
No matter if it’s a sheet of PE, small parts, larger subassemblies, or the hull, when I airbrush, I use what I call the North/South/East/West method. To do this, I set the brush for about a 1/8” wide pattern at a 1-1/2” to 2” working distance (airbrush tip to model). The pressure is between 12 and 18 psi. I pick a side and carefully start applying mist coats on and around details but only what I can reach from that side. This does include angling the brush up or down to get paint under overhangs or on sloped surfaces. When this side is done, I rotate the model 180 degrees and repeat the process. This is then followed by repeating the process again after rotating the model 90 degrees and then another 180 degrees. I do not try for full coverage yet. At this point, I’m focussing on getting paint into all the nooks and crannies and a mist coat on the larger surfaces.
I repeat the process and this time go for full coverage in the nooks and crannies and under overhangs with 75-80% coverage on the large surfaces.
Lastly I open the pattern up to not quite half an inch when backed off to a working distance of 4 to 6 inches and go for full coverage of the larger surfaces. I’ll often thin the paint a little more and up the pressure a couple of pounds for finer atomization. When the paint is dry, I carefully and slowly remove the masking tape. If you used liquid mask anywhere wait until the paint is cured to remove it.
The USS Louisville in Measure 21 Camouflage:
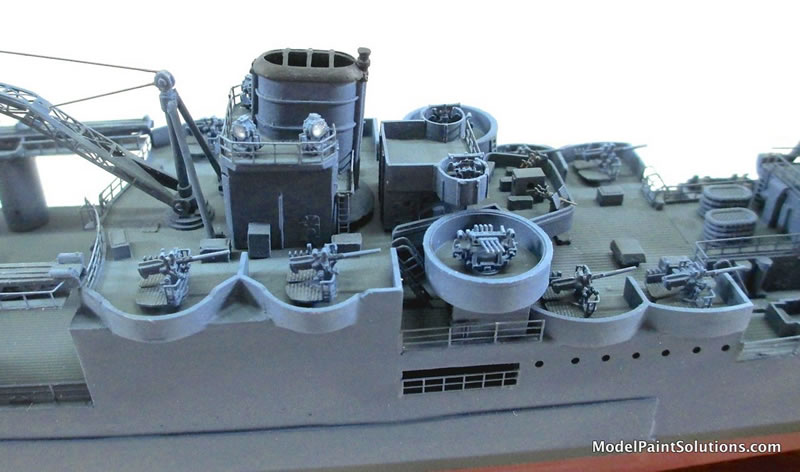
The topic of this article is the old Blue Water Navy USS Louisville in finished in Measure 21 camouflage. The US Navy referred to their camouflage schemes as “measures.” Measures were detailed in various editions of “SHIPS-2.” Additional information can be found in various editions of “Instructions for the Painting and Cementing of United States Navy Vessels.” Some of these references may be found online.
Measure 21 required all horizontal surfaces to be painted 20-B Revised Deck Blue and all vertical surfaces to be 5-N Navy Blue. Note that colors listed with 20 in their nomenclature were for external horizontal surfaces and those with 5 were for external vertical surfaces. This convention goes back to at least 1902.

Thanks for reading along. Masking the boot topping and the deck are jobs made easier using a couple of tricks and the right tools. In future articles I’ll describe painting Measure 12 Modified Splotch and Dazzle camouflage schemes.
Until then,
Ron
For more on this article visit ModelPaintSolutions.com
https://modelpaintsol.com/guides/ship-masking-basics
Text and Images Copyright © 2024 by Ron Smith
Page Created 13 December, 2024
Last updated
13 December, 2024
Back to HyperScale Main Page
Back to Reviews Page

|
Home
| What's New |
Features |
Gallery |
Reviews |
Reference |
Forum |
Search